Are you wondering how to plant Monstera in LECA? Growing Monstera plant in LECA and semi-hydroponics can be daunting at the beginning. Let me share with you a detailed step-by-step guide on how to plant Monstera in LECA with great success. I have been growing my variegated Monstera (Albo borsigiana) and Monstera Thai Constellation in LECA, and they are happy and thriving.
Monstera Deliciosa is a popular and loved houseplant due to its beautiful massive leaves, leaf fenestrations and variegation. Due to its popularity, it comes with a hefty price tag and sought after most especially the Monstera Deliciosa Albo borsigiana (Variegated Monstera) and Monstera Thai Constellation.
How to plant Monstera in LECA
In a nutshell, you will need a washed and clean LECA enough for your chosen pot, preferably with no drainage. Ensure that your monstera plant has clean roots and remove all soil as much as possible. Plant your monstera on the upper 1/3 part of the container to ensure that it won’t get too shocked and stress in its new growing environment. Fill the lower 1/3 of the container with PH corrected and fertilised water. Place the plant in a bright, humid and warm environment until it adapts to LECA.
Now, let’s breakdown the process into more detailed step-by-step guide on how to plant your Monstera in LECA and semi-hydroponics to ensure its successful transition from soil.
Read more: Can You Grow Succulents in LECA and Semi Hydroponics?
Step-by-Step Detailed guide on how to plant Monstera in LECA and semi-hydroponics

Step 1: Acclimatised the plant
Acclimatising your plant is essential to ensure that it will successfully adapt to its new surroundings. From the moment you received your plant parcel, make sure not to open it immediately and so it can adapt to the current room temperature.
After a couple of hours, you can open the parcel and place the plant in a quarantine corner for observation, just in case it has any pests or disease. Do not mix it with the rest of your plant collection to avoid any infestation.
At this stage, your plant is most likely facing lots of environmental stress due to change of temperature, humidity drop and lack of sunlight during transit. So it is important to let them rest first before embarking them to another stressful situation such as repotting and disturbing the roots.
Let the plant adapt to the new environment for a few days or even weeks before converting it to LECA.
Read more: 15 Best Plants for Leca and Semi-Hydroponics Growing
Step 2: Prepare the LECA and the container
Once the Monstera plant managed to acclimatise to your climate, it is now time to prepare your new medium – LECA (Lightweight Expanded Clay Aggregate).
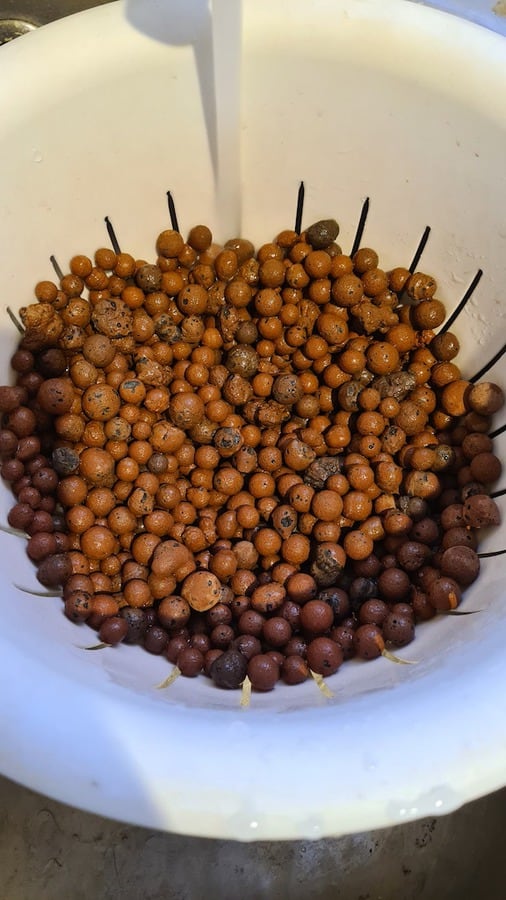
There are many ways on how you can prepare LECA for semi-hydroponics. Other plant enthusiasts that are into using LECA for semi-hydroponics tend to boil the LECA in water as if they are cooking it on the hob and then soaking them for 24 hours before using them.
I personally prepare my LECA for semi-hydroponics less complicated than the others. I do wash the LECA in a colander under the hot tap running water. I just keep on shaking them constantly until I can see clear water running from the colander. Then we are good to go! I do not soak the LECA anymore in water for 24 hours because it doesn’t really make any difference as LECA is a porous material so it is instantaneous when it absorbs water.
Step 3: Prepare the water correct PH levels and nutrients.
Growing plants in semi-hydroponics require the correct water PH levels to ensure that the plant can absorb the optimum nutrients needed for it to produce food. I personally use the tap water and use the PH down solution to correct the PH level.
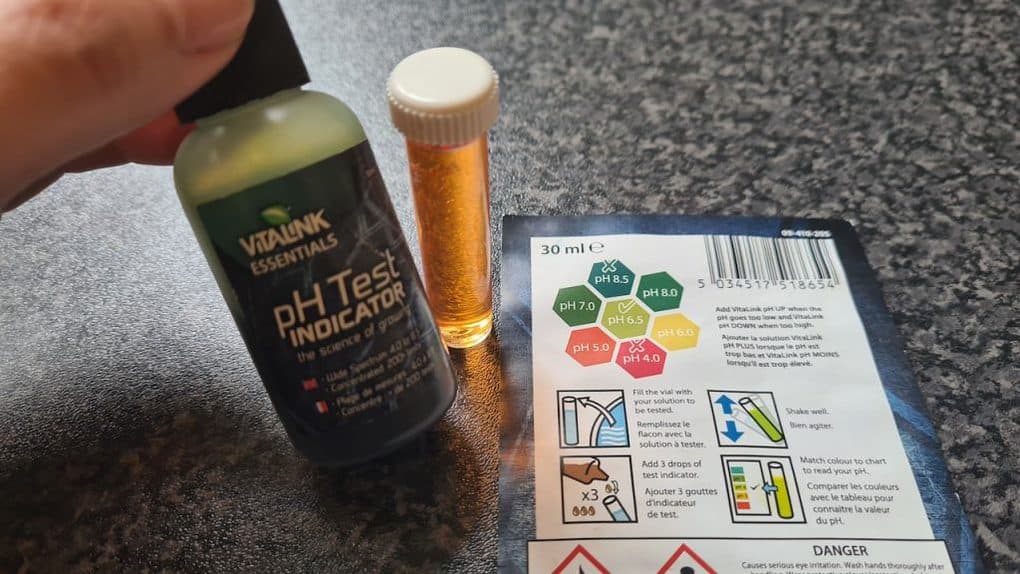
Using the PH level tester is vital for checking if the water is on the correct PH level range. Plant’s ideal PH level is around 5.5 to 6.5 PH.
Step 4: Remove all the soil and dirt.
It is now time to remove all the soil from your Monstera plant. It is important to ensure to remove all the dirt including the ones attached to the roots. Using a small brush while soaked in water can help to remove the dirt gently without stressing or damaging the root system. Keep on cleaning the roots system until it’s all white and free from dirt.
If you let the dirt sit in the nooks and crannies of the root system, this will be a potential cause of root rot.
Step 5: Soak the roots in Epsom salt and water.
Once all the dirt has been removed from the root system, it is best to let root soak first in a correct PH level water with Epsom salt. This is to help the plant cope and recover from the transplanting shock and environmental stress.
I personally let the plant sit in Epsom water solution for 24 hours before planting it in LECA to help them get the nutrients and the root can easily transition from soil to LECA.
Step 6: Fill the container with LECA
It is now time to put the Monstera plant in LECA. Fill the chosen container with or without drainage up to the two-thirds way up. Use the clean LECA that you prepared in Step 2.
Filling up your container two-thirds up, will ensure that the Monstera’s root system will have enough space between the water reservoir and the roots. Remember that the roots are still considered as “soil roots”, so it important to ensure that the roots will slowly get used to the new environment and medium.
Step 7: Place the Monstera in the container
Once the container is filled with LECA two-thirds full, it is now time to place the Monstera plant into the container. Let the roots sit at the middle of the pot and spread the roots evenly so it can have more room to grow and encourage better air circulation within the root system.
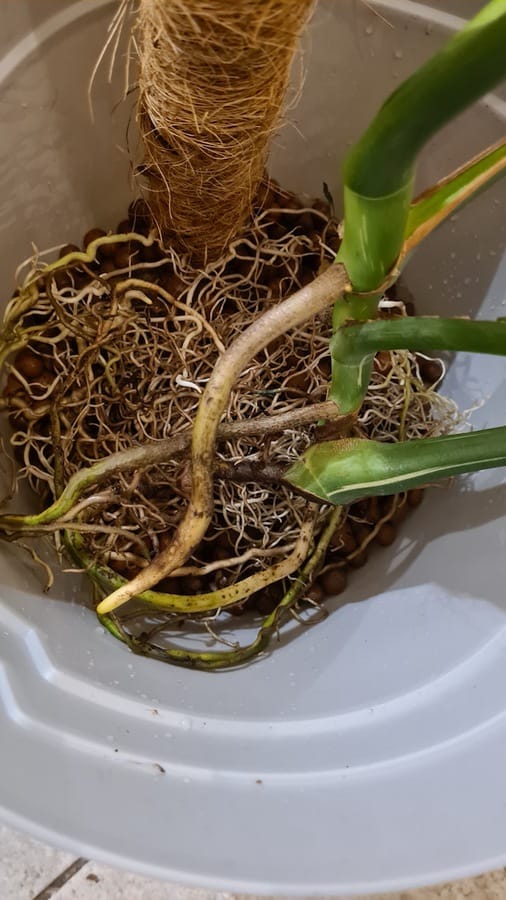
Then fill the remaining space with more LECA up to the top of the container. Ensure that all the roots are covered with LECA to keep it moist and avoid getting dried.
Step 8: Fill with nutrient water as a reservoir.
Once the pot is now filled with LECA, it is now time to add the nutrient solution that will serve as a water reservoir for the Monstera plant. Put about an inch height of water at the bottom of the container. The nutrient water will keep the medium moist and encourage the “water or LECA roots” to grow to adapt to its new environment.
If the pot has drainage holes, it is ideal to use a tray dish to hold the water underneath the container. If you are using a glass vase without a drainage hole, you can fill it with an inch height of nutrient water.
Some semi-hydroponics growers, drill a drainage hole into their glass vase to ensure that the water will remain up to that level within the vase. You can also do this, but be very careful in drilling a hole into the glass vase.
Step 9: Place on a heat mat and bright area.
Placing the newly potted Monstera plant on a heat mat and bright area can help the plant to have the right growing conditions to develop its new roots that is adapted to LECA. Keep an eye for old dead roots as they can be a source of root rot and it can easily spread through the whole root system and worst up to the node.
When I first transferred my Monstera Albo in LECA, it was a newbie mistake that easily done. I didn’t place the newly potted plant on a heat mat and “bright enough” area that the plant required. As a result, one of the roots succumbs to root rot and nearly got into the node area. I lost the top cutting due to the rot keeps growing to the node area. However, I managed to save the lower part of the plant.
Lesson learned the hard way, so always ensure to use your heat mat and place the plant in front of a grow light.
Step 10: Check and see it thrive!
It is important to check the Monstera plant in LECA at least once or twice a week to ensure that there is no rot sneaking to kill the plant. You can use the shower method – wherein you will flush the whole pot with water to ensure there is no nasty build of dead roots in the pot. The water reservoir method – wherein you will use the lower 1/3 of the pot as a reservoir can also be used to help the Monstera plant get used to its new medium.
After a few weeks, your Monstera plant whether it Albo Borsigiana, Thai Constellation or Monstera Aurea will surely convert successfully into LECA as its new medium.
I hope that my personal process on how to plant monstera in LECA will help you to convert your plant into a new medium.

ABOUT THE AUTHOR:

Ryazan Tristram
Succulent and houseplant collectorI’m Ryazan, confessed succulent-holic and proud plantita (plant mom) based in Birmingham, UK. Proud succulent hoarder for a couple of years now and my collection keeps growing! Let me help you to turn your home into a succulent and houseplant oasis that you will love!
Do you use nutrients with every fill in LECA for the Thai con. Mine has been rooted for the second time. She is in a small container and her roots are now on the bottom of the containers. Should I take her out and rearrange the roots further up in the LECA or should I get a taller container. I heard they like the roots crowded and only then will they produce new leaves. I presently have two leaves. I usually use foliage pro by dyna grow but unsure it it should be diluted to the instructions or watered down to half that.
Hi Sandra, Thai Cons like to be root-bound to a healthy degree. They need a stable pole too to encourage them to grow new leaves. I also water my Thai Cons with nutrients every time. However, every wintertime, I only use 50% of the suggested fertilizer amount.